
Sep 18, 2024Updated Sep 21, 2026
Row-Level Security (RLS) in Power BI Embedded: How It Works and How to Set It Up
ByVlad Mihanta

Row-level security is what lets one Power BI report serve many customers, regions or departments and show each of them only their own rows. In the Power BI service it is a settings page: define roles, add users. In Power BI Embedded the same roles apply, but the viewer never signs in to Power BI, so your application has to tell Power BI who is asking, on every request, inside the embed token.
That one difference is where most embedded RLS problems come from. This guide walks through how RLS works, static versus dynamic roles, exactly what to pass in the embed token, the errors you will meet along the way, and how to get all of it without writing the token code yourself. Updated for 2026 and checked against Microsoft's current documentation.
That one difference is where most embedded RLS problems come from. This guide walks through how RLS works, static versus dynamic roles, exactly what to pass in the embed token, the errors you will meet along the way, and how to get all of it without writing the token code yourself. Updated for 2026 and checked against Microsoft's current documentation.
What row-level security is, and what changes when you embed
Row-level security (RLS) restricts which rows of a semantic model a person can see. You define roles in Power BI Desktop, each with one or more DAX filter rules on tables, and Power BI applies those filters to every query that person runs. One model, one set of reports, many audiences, and no duplicated copies per customer.
Three things about RLS are true everywhere:
Three things about RLS are true everywhere:
- The filter is enforced by the engine, not the visual. A user in a restricted role cannot slice, drill or export their way to other rows.
- A model with no roles is open to everyone who can query it.
- RLS applies to the Viewer role. Workspace admins, members and contributors can edit the model, so it does not apply to them in the Power BI service.
- Role membership in the Power BI service is ignored. Assigning users or groups to roles in the service has no effect on a report opened with an embed token. Microsoft's documentation says so in a single line, and a surprising share of "RLS isn't working" tickets end right there.
- The token carries the identity. Your application authenticates with a service principal or a master user, asks Power BI for an embed token, and states in that request which username and which roles to apply. Power BI then filters as if that user were a member of those roles. The identity you supply is always applied, so RLS filters even a token generated by a workspace admin.
Static vs dynamic RLS
Static roles: one role per slice
A static role has a fixed filter, such as
[StoreName] = "Blue Store". Everyone placed in that role sees the same slice. It is simple to reason about and easy to test, and it works well when the number of slices is small and stable: a handful of regions, a few departments, a short list of customers. Each new slice means a new role in the model, a republish, and an update to whatever assigns roles.Dynamic roles: one role, filtered by identity
A dynamic role uses a DAX function that returns something about the current user:
In an embedded scenario there is a twist worth understanding before you write a single rule. Under a service principal,
USERPRINCIPALNAME() or USERNAME(). The usual pattern is a user-mapping table (user, customer) related to the fact data, and a rule such as [UserEmail] = USERPRINCIPALNAME(). One role serves everyone, and adding a customer is a row in a table rather than a change to the model.In an embedded scenario there is a twist worth understanding before you write a single rule. Under a service principal,
USERPRINCIPALNAME() and USERNAME() do not return the end user, because the end user never signed in to Power BI. They return whatever your application passes as the username in the embed token. That is a feature, not a limitation: the username does not have to be an email address at all. Pass France with a rule of [CountryRegionCode] = USERNAME() and the report filters to France; pass a customer ID and filter on that. If you ever need a second value alongside the username, the token can carry an optional string that CUSTOMDATA() reads.Write rules that fail closed
Because your application can pass any string as the identity, a rule must return no rows for values it does not expect. Microsoft's own guidance uses this example: the first version returns every row for any typo, the second returns nothing.
1-- Fails open: any value other than "Worker" sees everything
2IF(
3    USERNAME() = "Worker",
4    [Type] = "Internal",
5    TRUE()
6)
7
8-- Fails closed: an unexpected value sees nothing
9IF(
10    USERNAME() = "Worker",
11    [Type] = "Internal",
12    IF(
13        USERNAME() = "Manager",
14        TRUE(),
15        FALSE()
16    )
17)A mapping-table rule such as
[UserEmail] = USERPRINCIPALNAME() already fails closed, since an unknown value matches no row. Either way, test the unexpected values as carefully as the expected ones.Setting up RLS in Power BI Desktop
Whether the report ends up in the Power BI service or embedded in your own application, the roles are built in Power BI Desktop. Three steps:
1. Define roles
On the Modeling ribbon, open Manage roles and create a role with a filter on one or more tables. A static role named Blue Store might filter
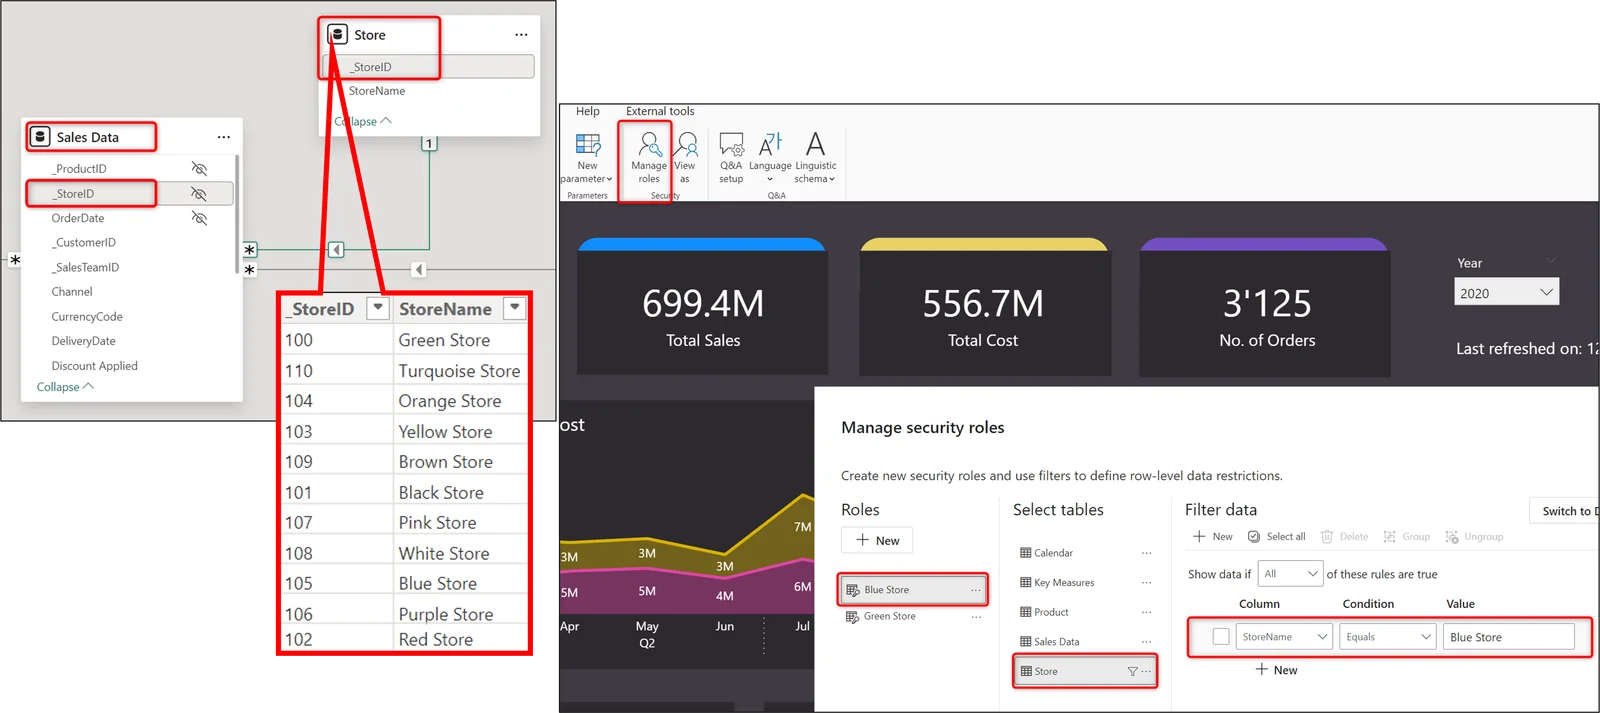 In our sample report, a Store table is linked to Sales Data via the _StoreID column. The Store table has a StoreName column, and we build the role on it. The relationship carries the filter through to the sales rows.
[StoreName] = "Blue Store"; a dynamic role named Customer might filter the mapping table on USERNAME().In our sample report, a Store table is linked to Sales Data via the _StoreID column. The Store table has a StoreName column, and we build the role on it. The relationship carries the filter through to the sales rows.2. Test with View as
Before publishing, use View as on the Modeling ribbon to see the report through a role. For dynamic roles you can also type a value to use as the username, which is the closest Desktop gets to simulating an embed token.
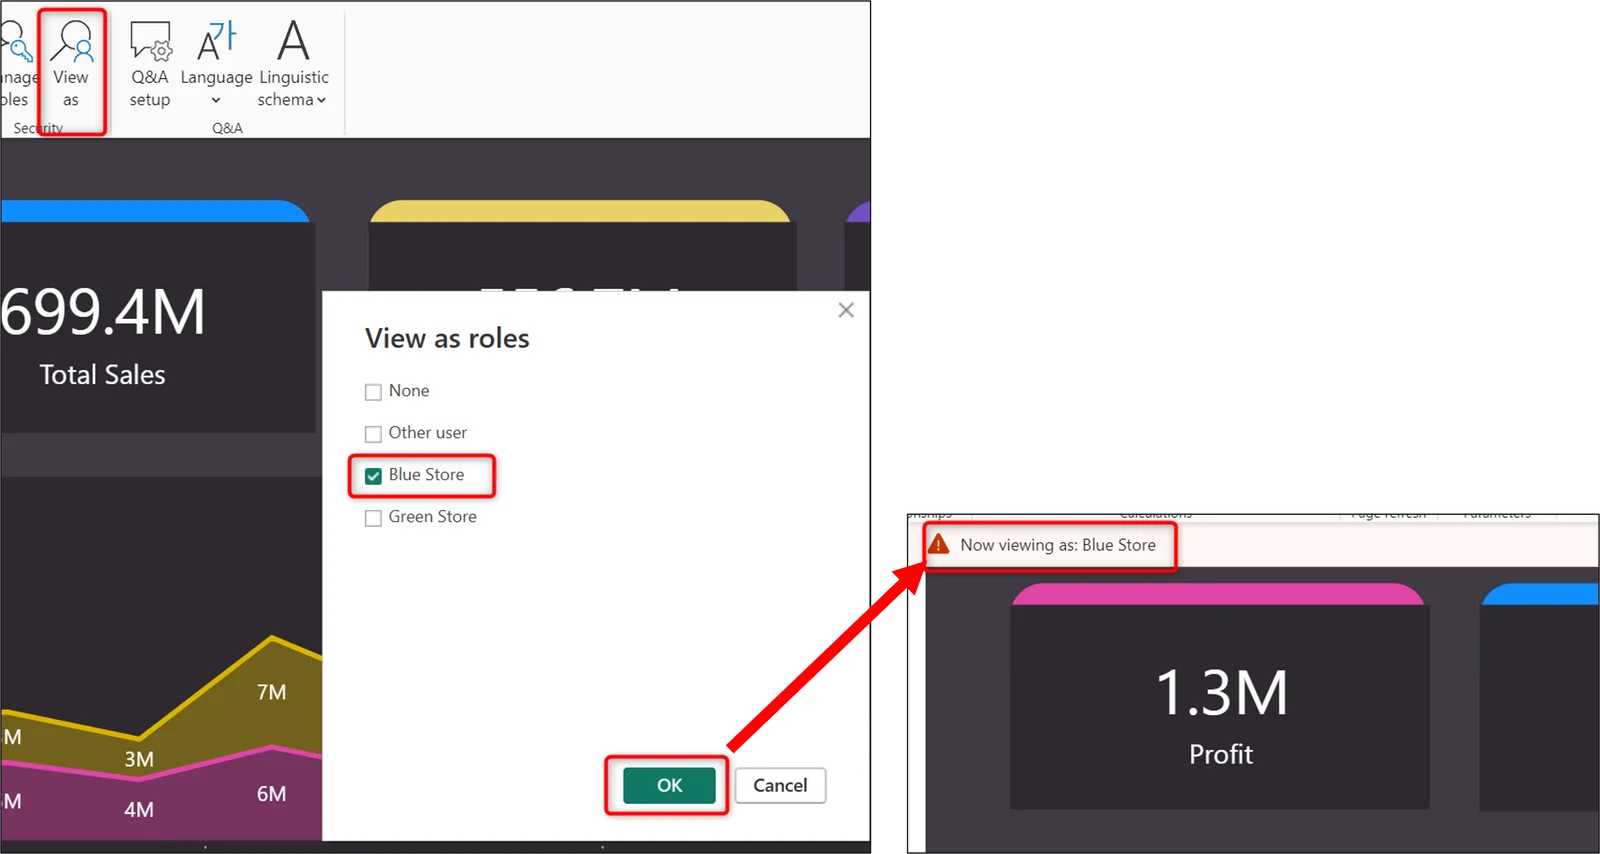 The displayed Profit is now much lower than before, because the tested role only has access to one store.
The displayed Profit is now much lower than before, because the tested role only has access to one store.3. Publish, and assign members for the Power BI service
Publish the report to a workspace. If people will open it in the Power BI service, or you embed for your own organization, assign users or Entra security groups to each role under the semantic model's Security settings. Groups are the better choice, since membership is then managed in one place.
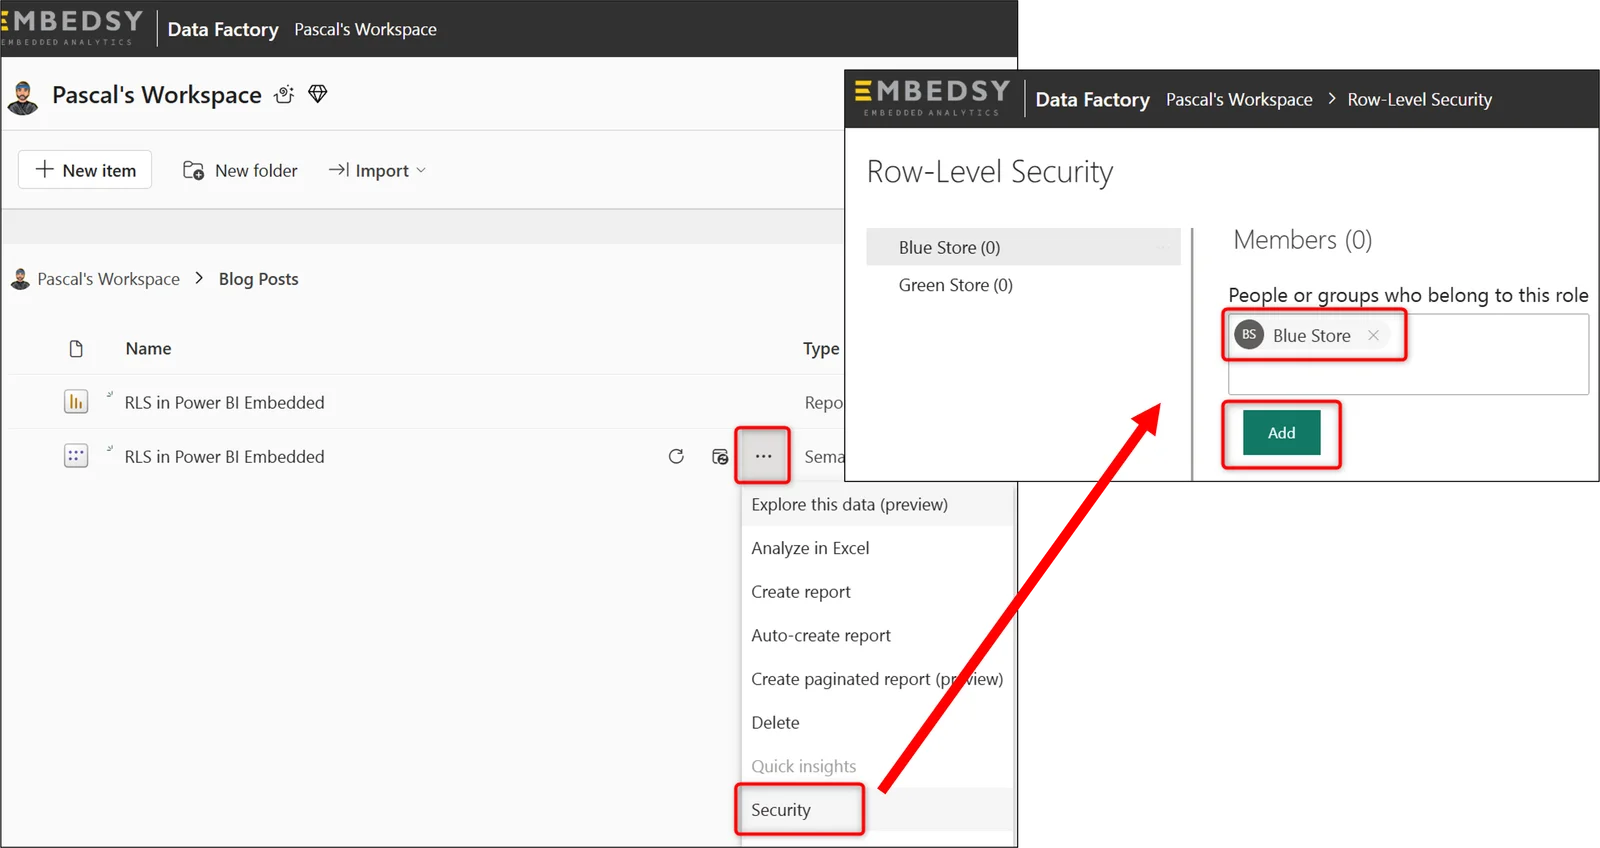 This assignment governs the Power BI service. For app-owns-data embedding it is not consulted at all; the next section is what applies there.
This assignment governs the Power BI service. For app-owns-data embedding it is not consulted at all; the next section is what applies there.RLS in Power BI Embedded: the effective identity
When your backend calls the Generate Token API, it can include an identities array. Each entry is an effective identity:
| Field | What to pass |
|---|---|
| username | Required. For dynamic roles, the value your rules compare against: an email, a customer ID, a region. For static roles it does not affect the filter and can be any string. One username per identity. |
| roles | Required when the model has RLS. The role name or names, as defined in the model, as a string array. |
| datasets | Required. The IDs of the semantic models this identity applies to. |
| customData | Optional. A string of up to 1,024 characters, returned by CUSTOMDATA() in your rules. |
A service principal must always supply an identity for any item whose semantic model has RLS. A master user may omit it, in which case token generation succeeds and the data comes back unfiltered.
A minimal example in Node.js
Authenticate as the service principal, build the identity, request the token, and hand only the token to the browser. The client secret never leaves your server.
1const msal = require('@azure/msal-node');
2const axios = require('axios');
3
4// Generate an embed token that applies an RLS role
5async function getEmbedToken(reportId, datasetIds, username, roles) {
6  const cca = new msal.ConfidentialClientApplication({
7    auth: {
8      clientId: '<YOUR_CLIENT_ID>',
9      authority: 'https://login.microsoftonline.com/<YOUR_TENANT_ID>',
10      clientSecret: '<YOUR_CLIENT_SECRET>', // server-side only
11    },
12  });
13
14  const { accessToken } = await cca.acquireTokenByClientCredential({
15    scopes: ['https://analysis.windows.net/powerbi/api/.default'],
16  });
17
18  // The effective identity: who is asking, and which roles apply
19  const identity = {
20    username, // dynamic roles filter on this value; static roles ignore it
21    roles,    // e.g. ['Blue Store'] or ['Customer']
22    datasets: datasetIds,
23  };
24
25  const response = await axios.post(
26    'https://api.powerbi.com/v1.0/myorg/GenerateToken',
27    {
28      datasets: datasetIds.map((id) => ({ id })),
29      reports: [{ id: reportId }],
30      identities: [identity],
31    },
32    { headers: { Authorization: `Bearer ${accessToken}` } }
33  );
34
35  return response.data.token; // this is all the browser receives
36}
37
38// Static role: the username is irrelevant
39getEmbedToken('<REPORT_ID>', ['<DATASET_ID>'], 'viewer', ['Blue Store']);
40
41// Dynamic role: the username is the filter value
42getEmbedToken('<REPORT_ID>', ['<DATASET_ID>'], 'customer-4711', ['Customer']);The same request in C#, Java or Python looks alike. Microsoft's guide to embedding with RLS documents the request body in full.
Common errors and how to fix them
"Creating embed token for accessing dataset … shouldn't have effective identity"
You passed an identity for a semantic model that does not support one, usually an import model with no RLS roles. Power BI rejects the request rather than ignoring the identity. Call the Get Dataset API and check
IsEffectiveIdentityRequired: if it is false, drop the identity for that model. If it is true and the request still fails, the username, a role or the dataset ID is missing from the identity. Microsoft's troubleshooting page lists the checks in order.Every viewer sees all the data
The usual causes, in order of how often we meet them: the token was generated by a master user without an identity, which is allowed and returns everything; a rule that fails open, as in the example above; users were assigned to roles in the Power BI service in the belief that it applies to embedding; or the report is bound to a different semantic model than the one carrying the roles.
A user sees no data at all
With a dynamic role, the username in the token matches no row in the mapping table. That is the rule working as written, but to the user it looks broken, so compare the exact value you pass with what the table holds. If some rows come through and others don't, look at the model: RLS filters only propagate through active relationships, so a filter on a dimension table reaches the facts only along a relationship that exists and is active.
Dynamic RLS works in "Test as role" but not when embedded
Test as role in the Power BI service evaluates the rules with your identity, so
USERPRINCIPALNAME() returns your UPN, not the user you are trying to simulate, and it does not reproduce the embedded authentication flow at all. The only reliable test of an embedded report is an actual embed token carrying the identity you intend to send in production.RLS, or a workspace per customer?
RLS is one of two ways to keep customers apart. The other is a workspace per customer, each with its own copy of the model, and many portals use both: a workspace per major client, RLS for the departments within it. The trade-offs are the subject of our post on workspace-per-customer versus RLS; it is worth deciding early, because it shapes how reports are published and updated from then on.
RLS in the Embedsy Portal: the same roles, none of the token code
Everything above about roles and rules still applies when you use the Embedsy Portal: RLS is defined in Power BI Desktop, exactly as described. What the portal removes is the effective-identity plumbing. It generates the embed token for every request, applies the right role, and gives administrators a place to assign and check roles instead of a codebase to maintain. RLS is included in every plan.
1. Assign the role when you add the report
When a report whose semantic model has RLS is added to the portal, a Row Level Role field appears and is required: the portal will not let you save the page without one. The page is then assigned to portal roles, which is how a customer, a region or a department gets its own filtered view. Portal roles can be mapped to Entra groups, so membership is managed where it already lives. The Adding Pages article covers the field.

Try to save a report that has RLS without choosing a role, and you get this warning.
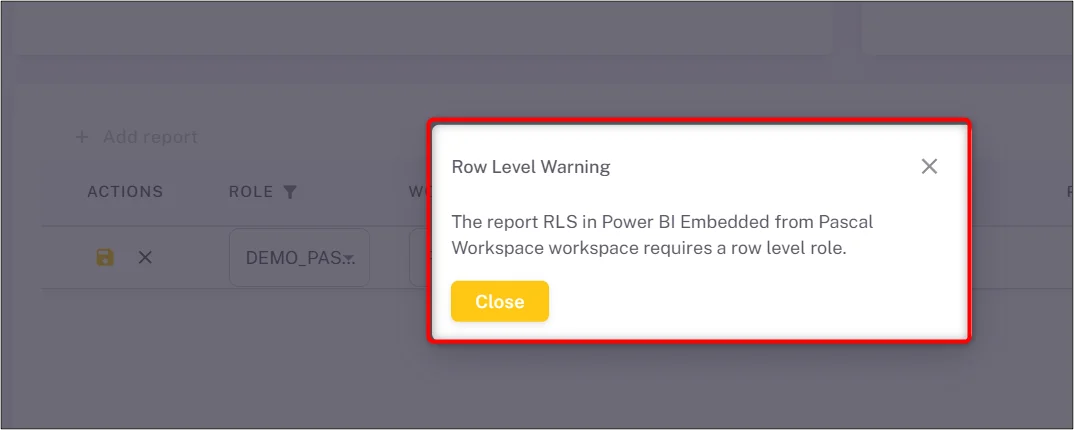
Try to save a report that has RLS without choosing a role, and you get this warning.
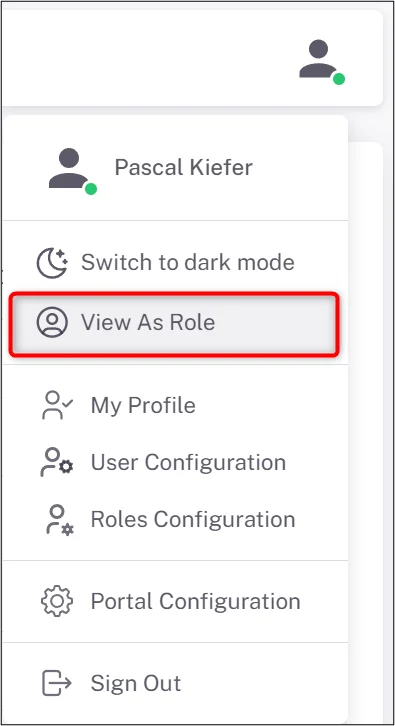
2. Check it with View As Role
Admins can open the portal as any role and see exactly what that role sees, report data included.
In this example the report filters correctly to the Blue Store.
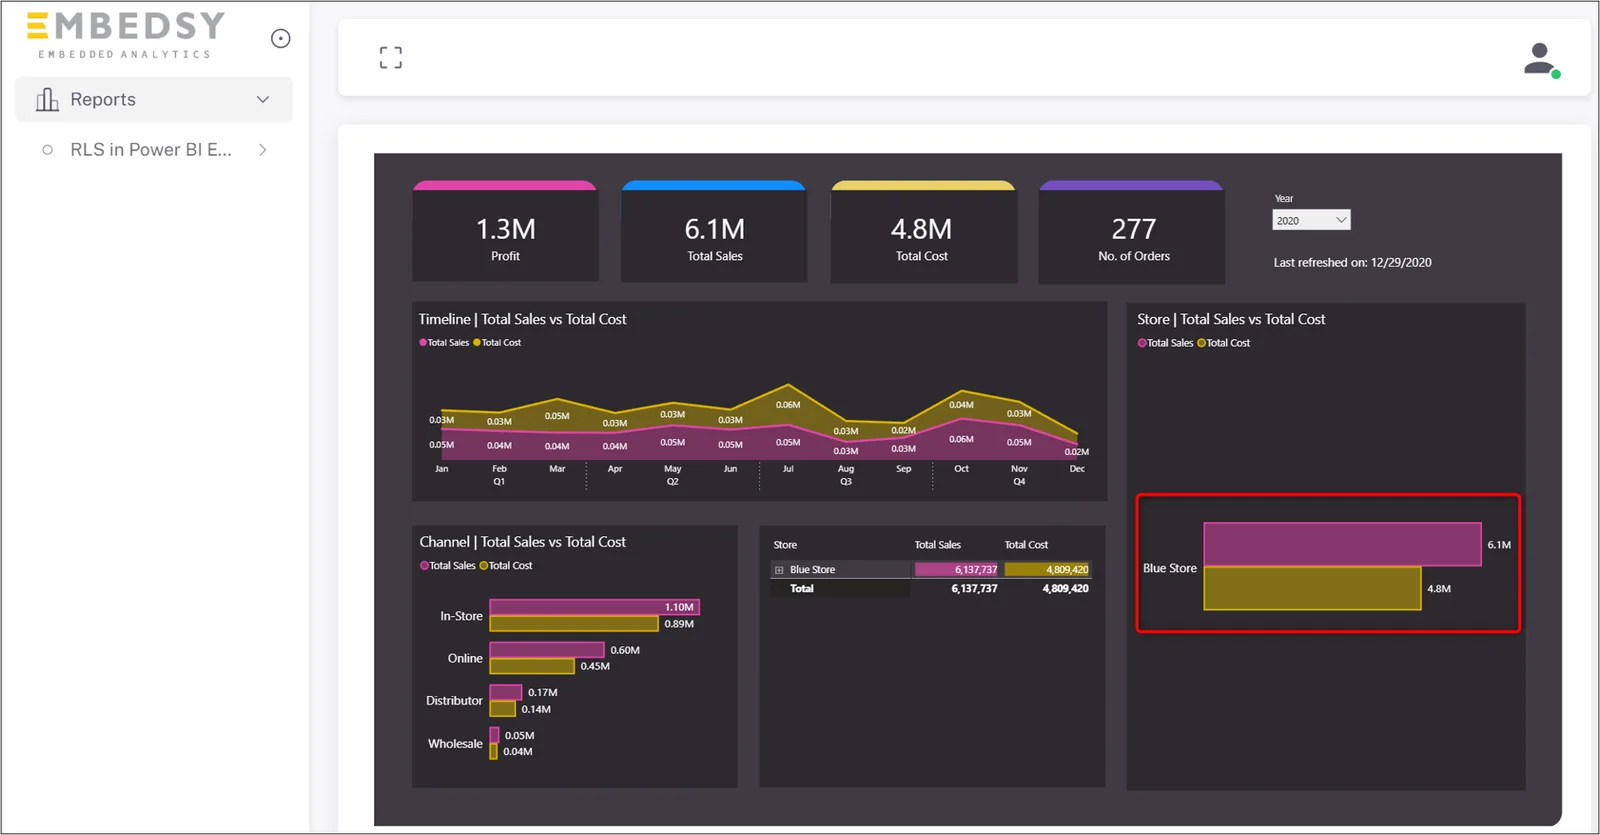
In this example the report filters correctly to the Blue Store.
3. Scheduled emails respect it too
Scheduled email exports are filtered by each recipient's own row-level role at delivery time, with an admin option to use one shared role for all recipients.
Frequently asked questions
What does RLS mean in Power BI?
Row-level security. Roles defined in the semantic model carry DAX filter rules, and Power BI applies those rules to every query a member of the role runs, so the same report shows different rows to different people.
Do I need Power BI Premium or a large capacity for RLS?
No. RLS is a property of the semantic model and works on any Power BI Embedded or Fabric capacity, from an F2 upwards. In the app-owns-data model your viewers need no Power BI license on any capacity size; our pricing guide has the details.
Can I filter an embedded report by the user's email or username?
Yes. Pass it as the
username in the effective identity, and USERPRINCIPALNAME() or USERNAME() in your rules return that value. Power BI does not know who your end user is; your application tells it.Is RLS secure enough to separate customers' data?
RLS is enforced by the engine on every query and is Microsoft's recommended approach for serving several customers from one model. The trust boundary is your token-generation code: keep it server-side, never expose the service principal's secret, write rules that fail closed, and test with real tokens. For thousands of customers, or where separation must be physical, use workspace isolation, on its own or combined with RLS.
Key takeaway
Row-level security in Power BI Embedded is the same feature as in the Power BI service, with one change that matters: the application, not the service, decides who the viewer is, on every request, inside the embed token. Get the effective identity right, write rules that fail closed, and test with real tokens rather than the service's role simulator, and one model can serve every customer you have.
If you would rather not own that token code at all, the Embedsy Portal applies the roles you already built, and you can see it filter a report in a free demo.
If you would rather not own that token code at all, the Embedsy Portal applies the roles you already built, and you can see it filter a report in a free demo.
Related reading
Sep 3, 2026
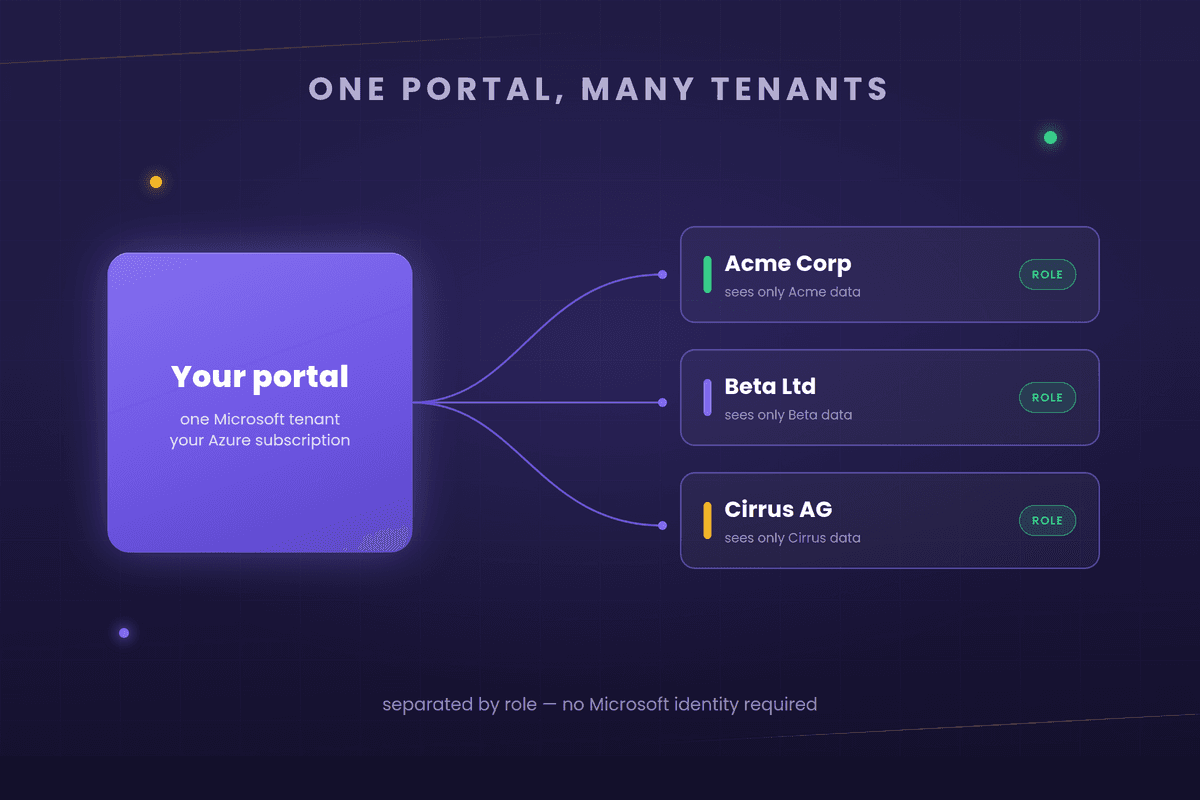
Multi-Tenancy in Power BI Embedded: A Workspace per Customer, RLS, or Both?

Pascal Kiefer

Nov 19, 2024Updated Sep 10, 2026
How to Share Power BI Reports with External Users Without a Pro License (2026)

Vlad Mihanta

May 11, 2026
Power BI Embedded with Direct Lake — What You Need to Know
Pascal Kiefer